Set up your REGEN Control Unit
Learn how to set up and use your new REGEN Control Unit.
BEFORE YOU BEGIN
To get the most out of your REGEN Control Unit, you
need a mobile device with the Rapid Reboot App downloaded. You also need
to make sure that your mobile device has Bluetooth turned on.
Download the iOS Rapid Reboot App.
Download the Android Rapid Reboot App.

PAIR YOUR DEVICE
- Download the Rapid Reboot App from the Apple Store or Google Play Store.
- Open the app and turn on your REGEN Control Unit.
- The app defaults to the Pair page, where your unit’s default name is shown. You can rename your unit later using My System in the app’s menu.
- Slide the toggle icon next to your REGEN to ON.
- Select Pair.
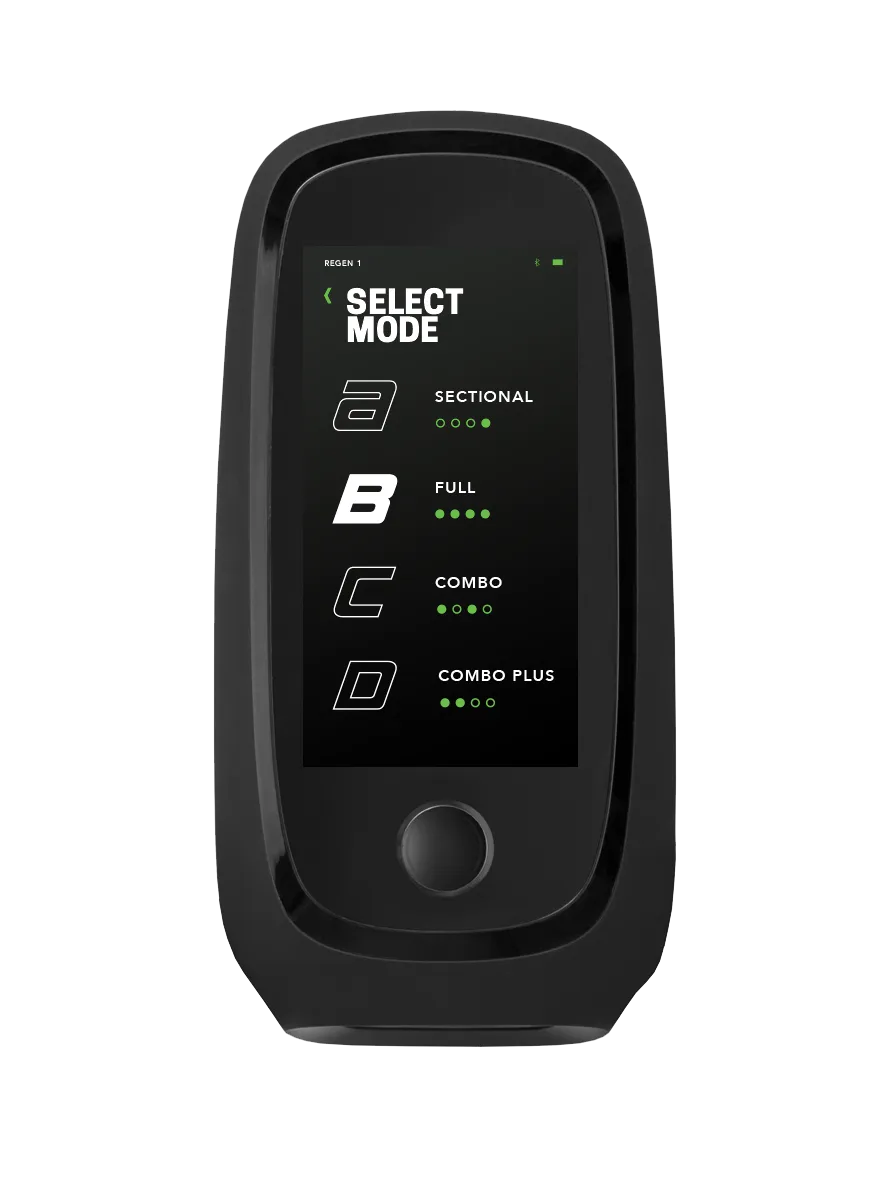
CHOOSING YOUR RECOVERY MODE
- Tap the Mode icon in the app or on your REGEN Control Unit.
- Select the mode you wish to apply to your session. This is the preset sequence in which chambers will inflate and deflate.
- A MODE is a sectional mode that is great for improving circulation during warm-ups, rehab, and relaxation.
- B MODE is a full flush mode ideal for post-exertion recovery, swelling, and sore and tight muscles.
- C MODE is a combination of A & B Modes and provides a less aggressive flush also ideal for circulation and recovery, inflammation, and sore and tight muscles.
- D MODE is similar to C Mode but with an added pulse to enhance circulation and prep the lymphatic system to mobilize lymphatic fluid, an essential component of healing and recovery.
- Each mode provides benefits of improved circulation and enhanced lymphatic function and thus can be used at any time. They vary more in terms of inherent intensity, which different users may find more preferential at different times.
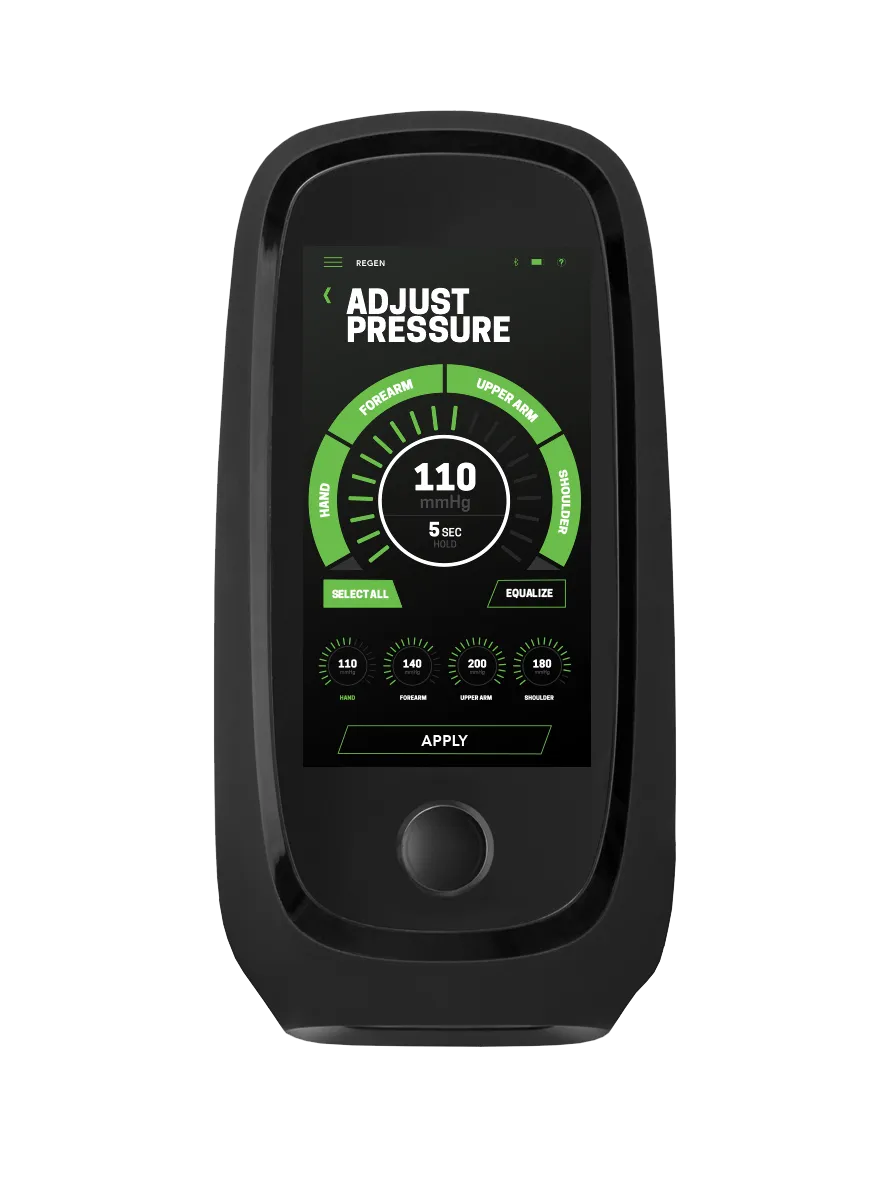
HOW TO USE PRESSURE SETTINGS
Watch PRESSURE SETTINGS Tutorial Video
- Tap the pressure dial in the app or on your REGEN Control Unit.
- Select the chamber you wish to adjust, then either drag your finger along the dial or use the +/- icons to change the pressure level.
- Use SELECT ALL to adjust all pressure levels proportionately.
- Use EQUALIZE to set all chambers to the pressure level of the highlighted chamber.
- Press and hold a chamber to deactivate it. Tap once to activate. Or, set the chamber pressure to 0 mmHg.
- Select APPLY to apply all changes to your session.
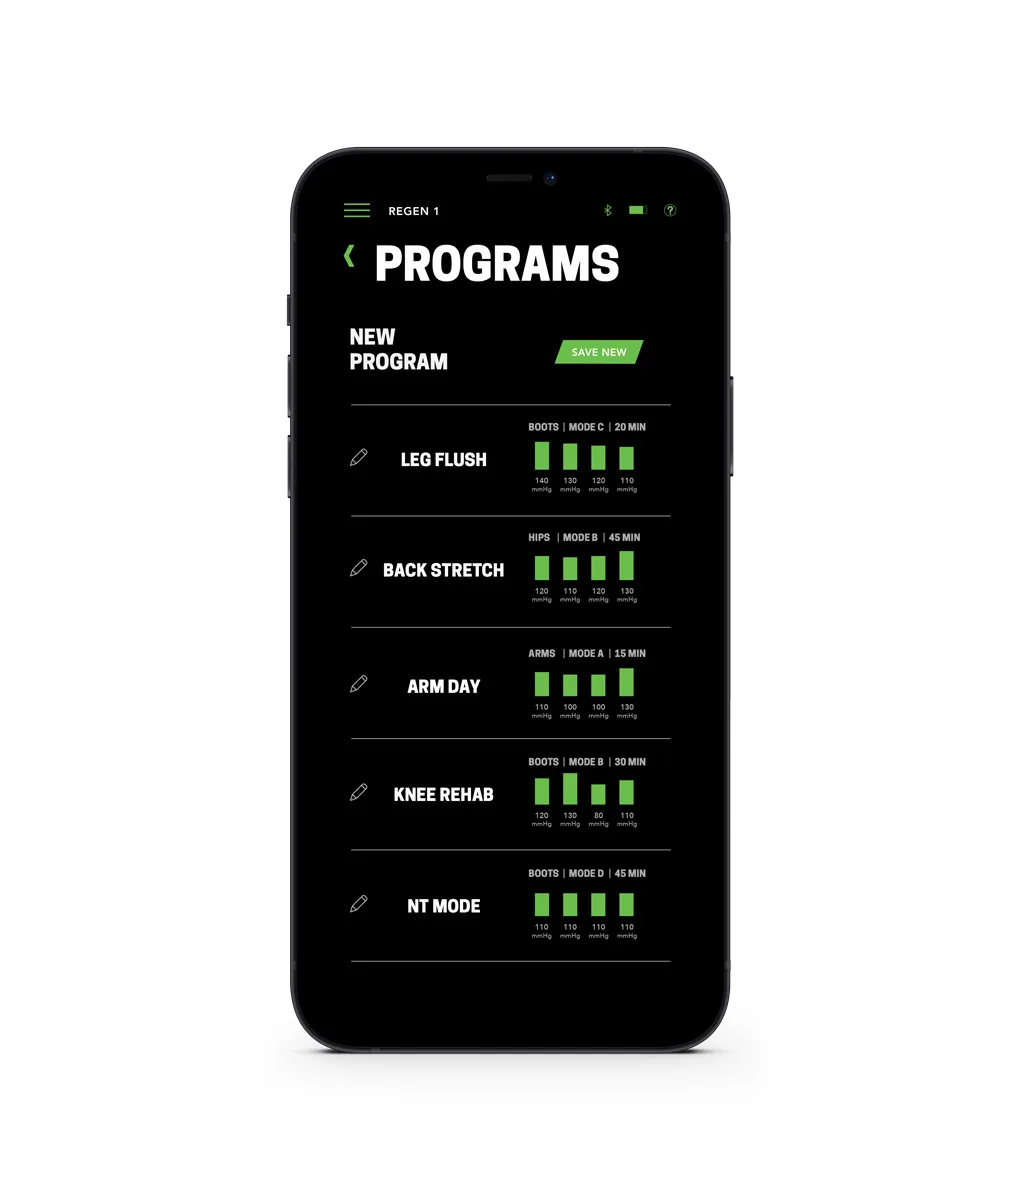
CUSTOMIZED RECOVERY PROGRAMS
- Pair your REGEN with your device in the Rapid Reboot App, and select the Programs icon in the app.
- Select the desired program to apply its saved settings.
- Press the Play icon to begin the session.
- Use the Programs icon during a session or the displayed options at the end of a session to save, update, or rename your programs.

CHAMBER HOLD
Watch CHAMBER HOLD Tutorial Video
- Tap the Hold icon in the app or on your REGEN Control Unit.
- Adjust each chamber’s hold time as desired. This is the time compression will be held at the set pressure before the sequence progresses to the next chamber.
- Select APPLY to apply all changes to your session.
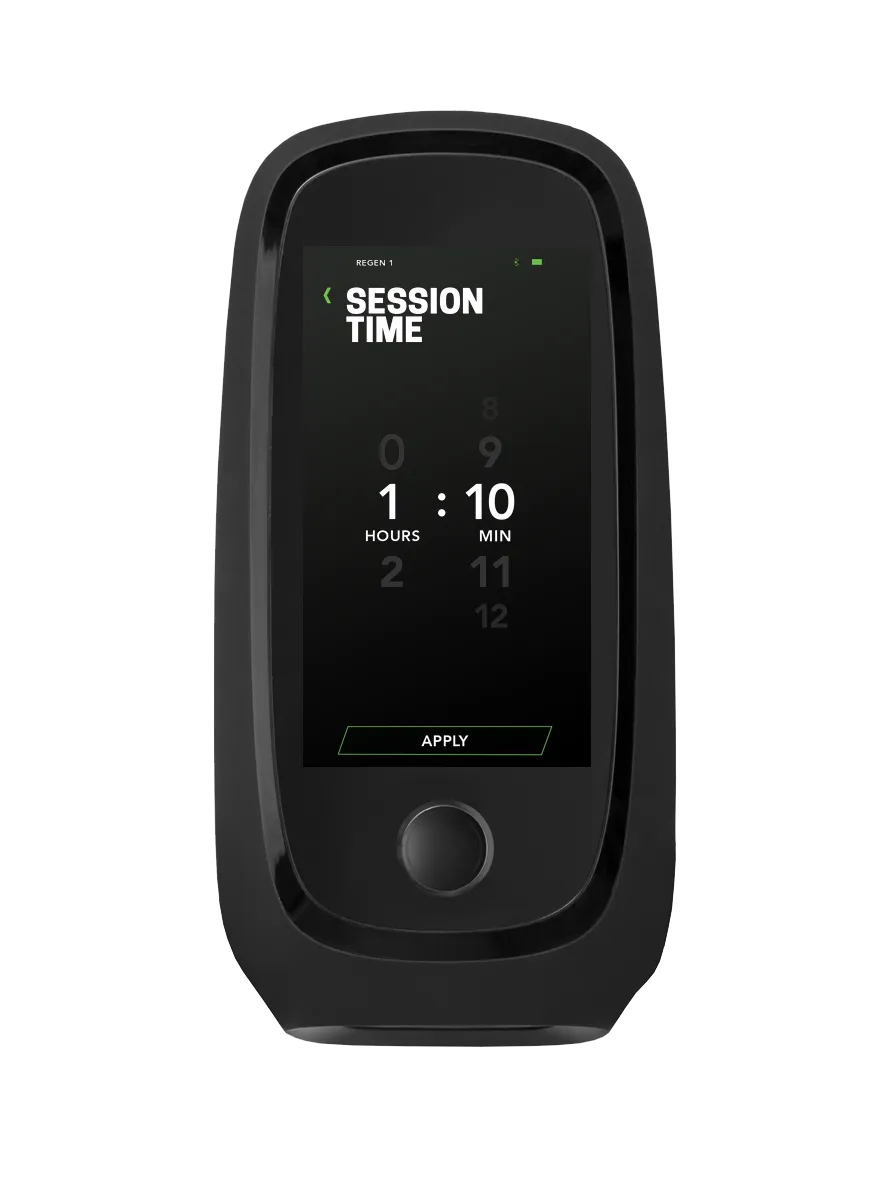
SESSION TIME
Watch SESSION TIME Tutorial Video
- Tap the Session Time icon in the app or on your REGEN Control Unit.
- Adjust the time as desired. This is the total duration of your treatment session.
- Select APPLY to apply all changes to your session.
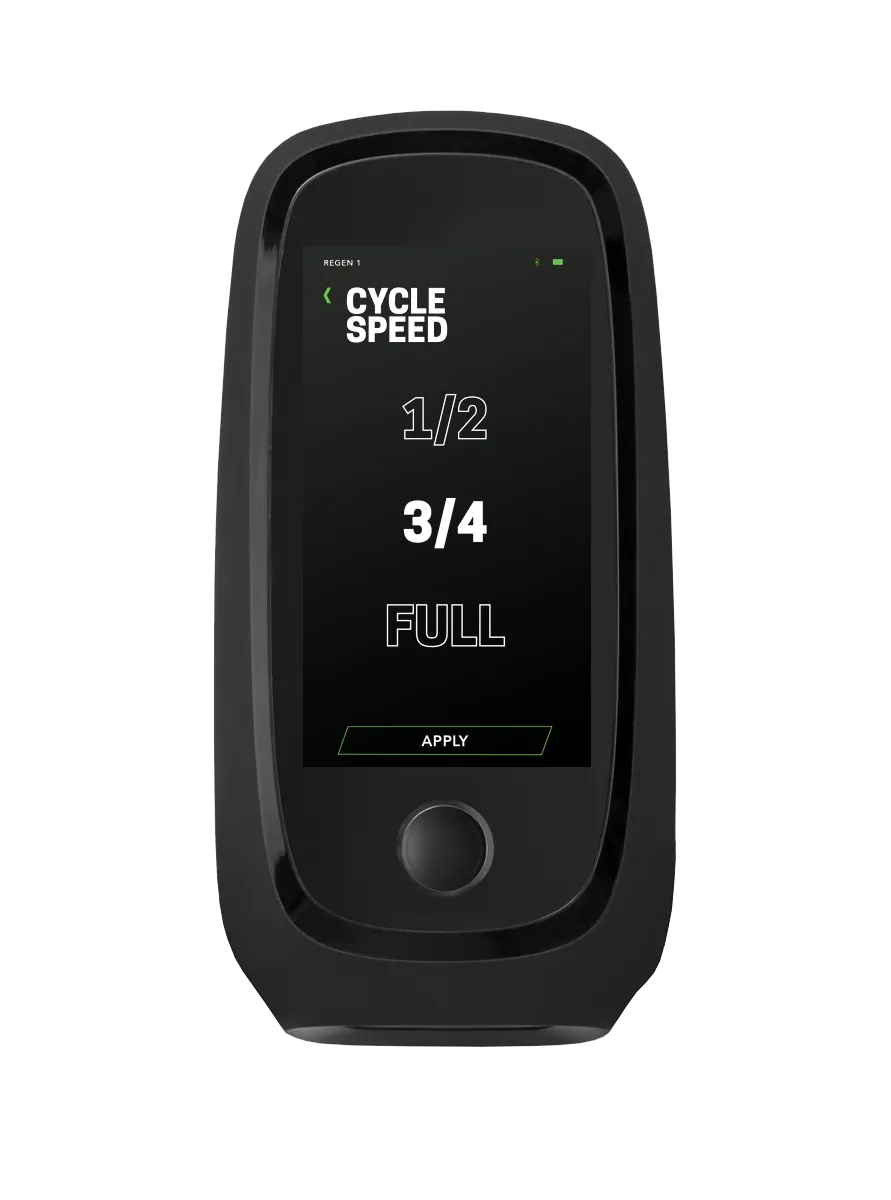
CYCLE SPEED
Watch CYCLE SPEED Tutorial Video
- Tap the Speed icon in the app or on your REGEN Control Unit.
- Select FULL, ½, or ⅔ to adjust the inflation speed as desired.
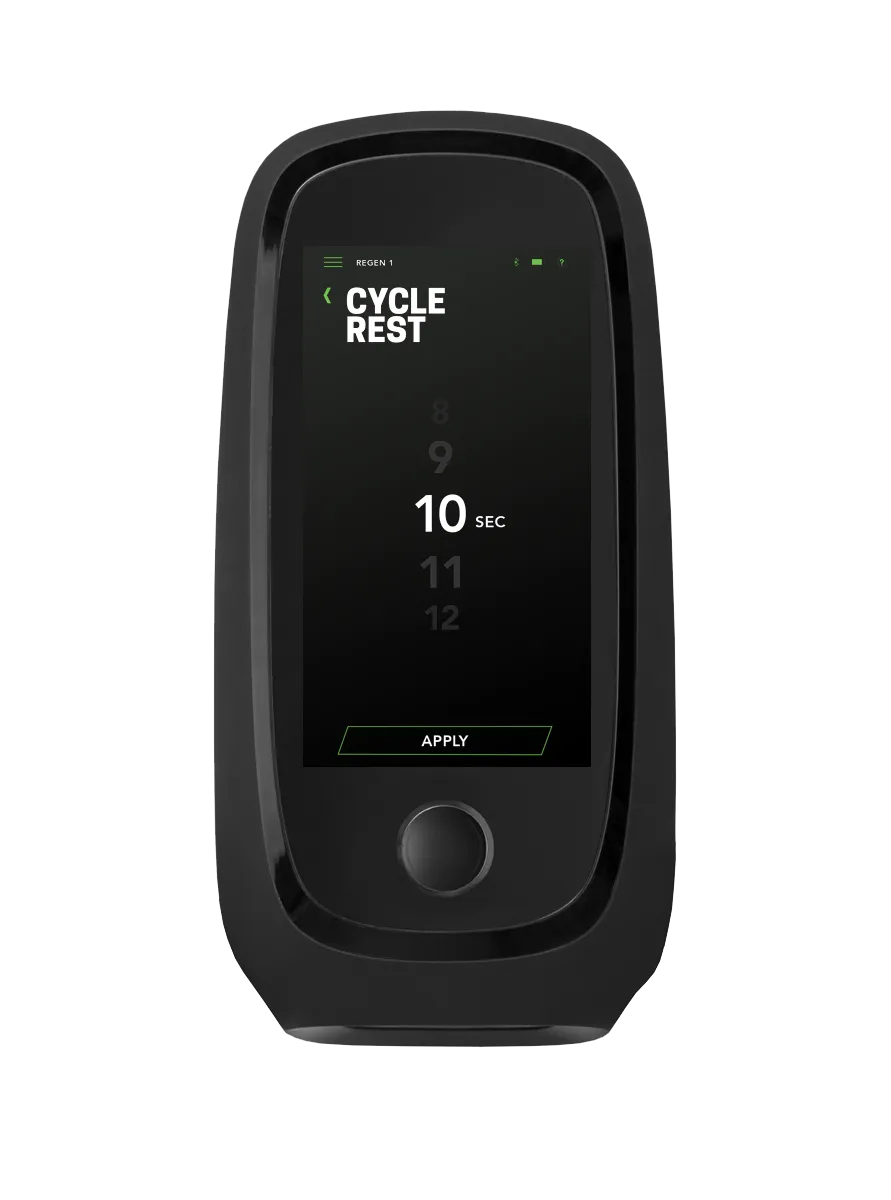
CYCLE REST
Watch CYCLE REST Tutorial Video
- Tap the Cycle Rest icon in the app or on your REGEN Control Unit. Adjust the cycle rest as desired.
- This is the time of rest between the end of a complete cycle and the start of the next.

RAPID DEFLATE
Watch RAPID DEFLATE Tutorial Video
- Deflate your Attachment at any time by tapping the Deflate icon in the app or on your REGEN Control Unit.
- You can also select the Deflate icon at the end of a session.
- The unit will vacuum the Attachment until it is completely deflated.
- Deflation time will vary depending on factors such as the size and type of Attachment.
GET HELP
If you still need help setting up your REGEN or have further questions, contact Customer Service.